Spatial Detection Best Practices
How to configure your Revit models for best spatial detection results
Internally, Deep Space stores element XYZ locations using transformed project coordinates.
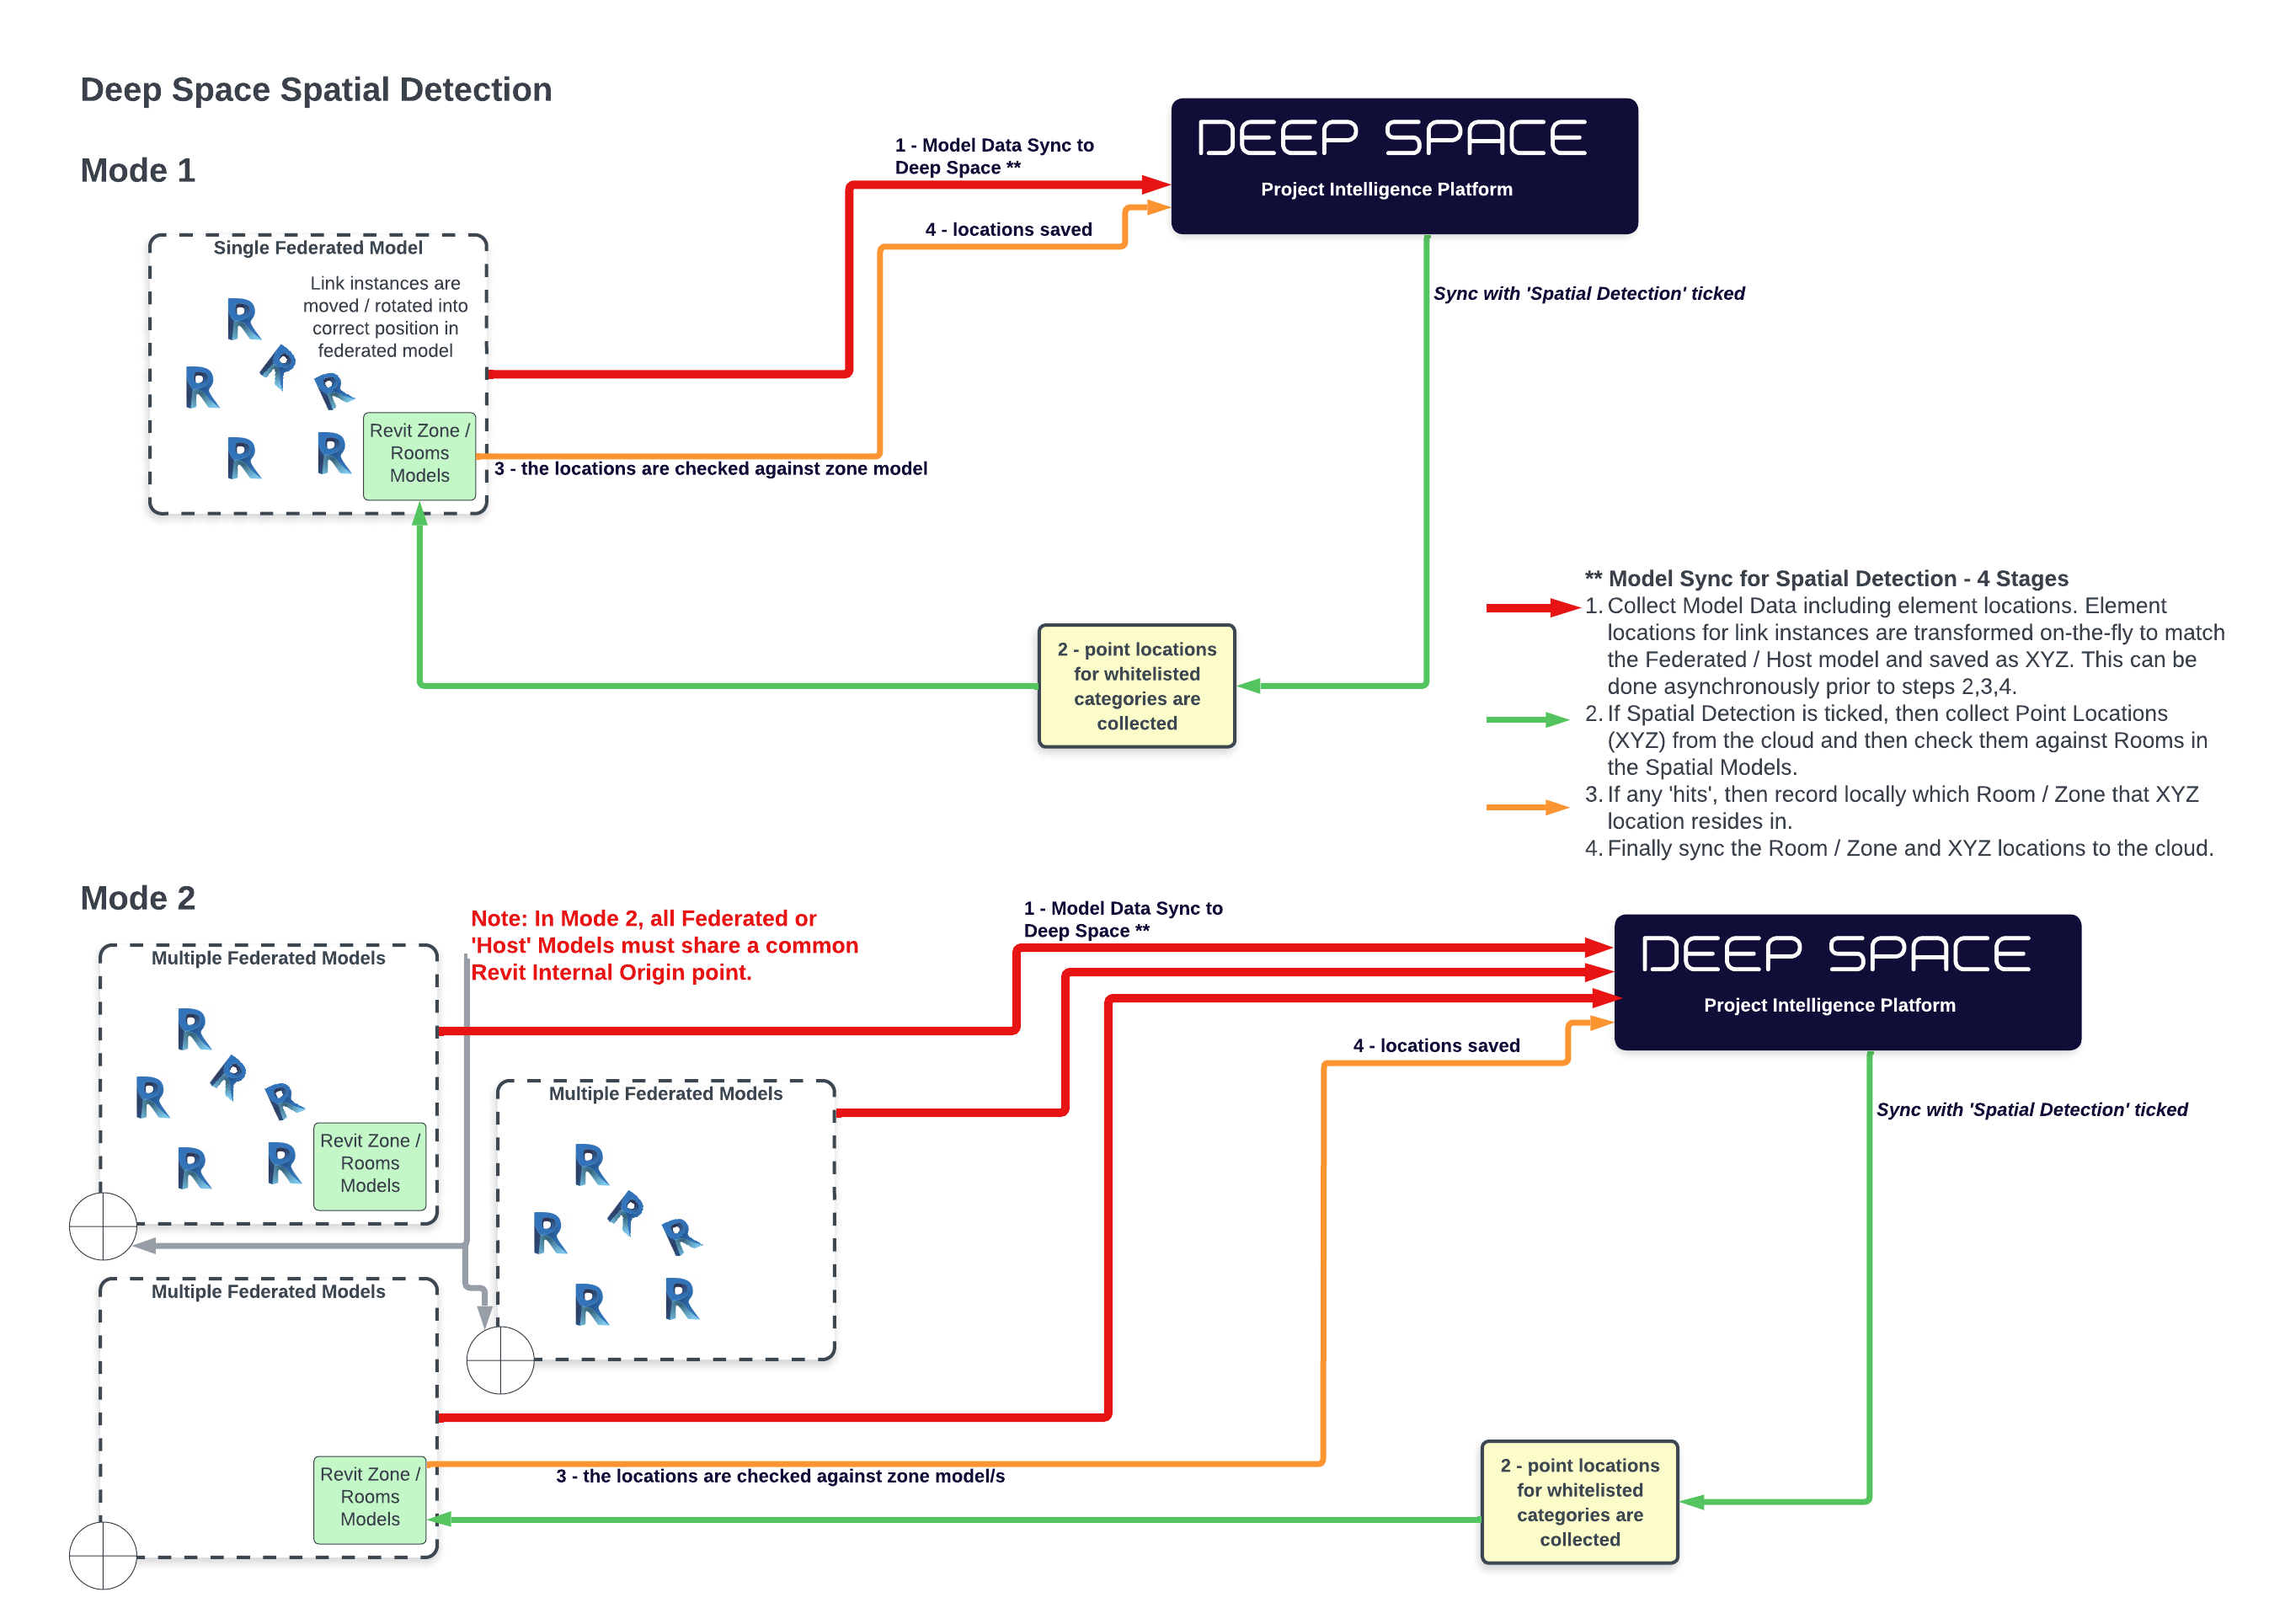
When federating models, the XYZ locations are transformed to be uniform to the federated model itself. The recommend workflow is that:
-
You have a single federated model, or if you have multiple federated models they all have the same project origin / project coordinates
-
The federated model has all other models linked to it and located correctly (in context)
-
You run all Deep Space Sync processes from that federated file
See image below for description of the Spatial Detection Modes and Stages:

Model Sync for Spatial Detection - 4 Stages
-
Collect Model Data including element locations. Element locations for link instances are transformed on-the-fly to match the Federated / Host model and saved as XYZ. This can be done asynchronously prior to steps 2,3,4.
-
If Spatial Detection is ticked, then collect Point Locations (XYZ) from the cloud and then check them against Rooms in the Spatial Models.
-
If any 'hits', then record locally which Room / Zone that XYZ location resides in.
-
Finally sync the Room / Zone and XYZ locations to the cloud.
