- Knowledge Base
- Workflows
- Enterprise Workflows
-
FAQs
-
Getting started
-
Feedback
-
General
-
Integrations
-
Deep Space Apps
-
Deep Space Actions
-
Deep Space Automations
-
Advanced App Configuration
- Advanced Configuration for Model Audit App
- Advanced Configuration for LOI Apps
- Power BI - Other Workflows
- Advanced Configuration for QTO App
- Power BI - Troubleshooting
- Deep Space App Configuration
- Using the Deep Space Embedded Dashboards
- Power BI - Setting Up Your Onsite Analysis Environment (optional)
-
DS Command
-
Workflows
-
Deep Space Sync for Revit
-
Data Management
-
Notifications
-
System Control App (Workspace Manager)
-
Release notes
-
Deep Space Forms
-
Learn More
Enterprise and Multi-Project Pack - Creating New Projects
How to create new projects
Steps to create a new project
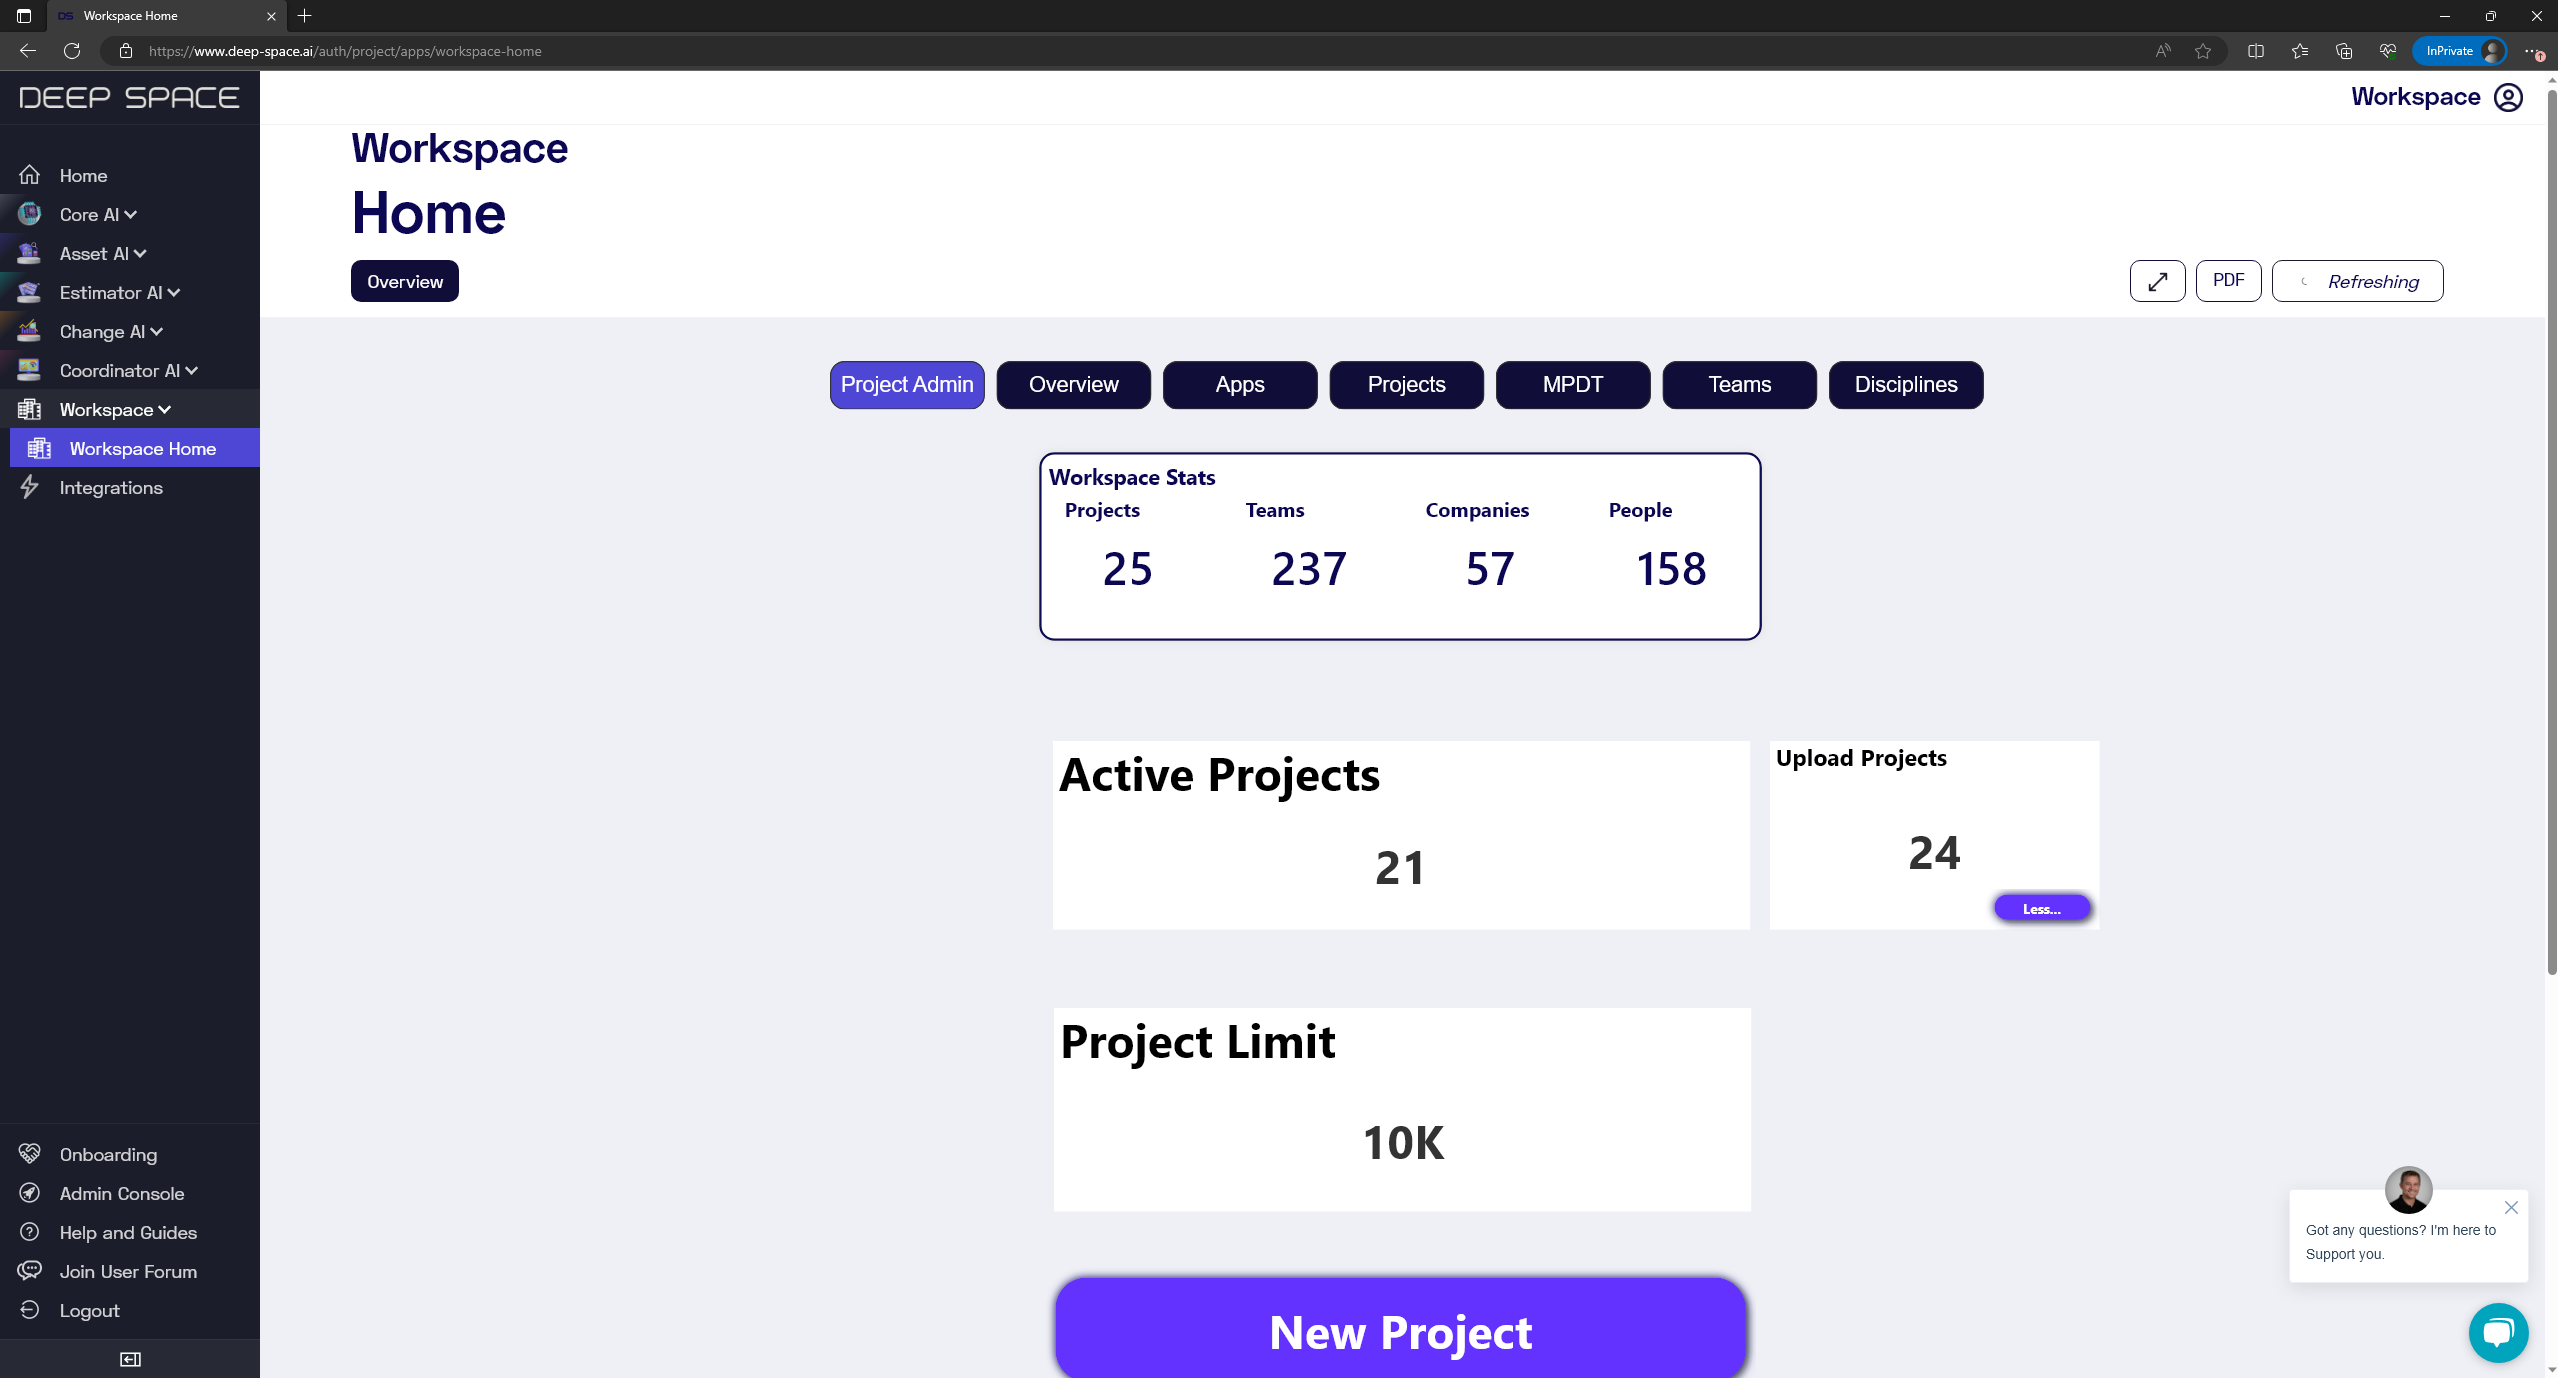
1 - Login to the " Workspace" slot (instead of selecting a project)
2 - Access Workspace Home, Project Admin
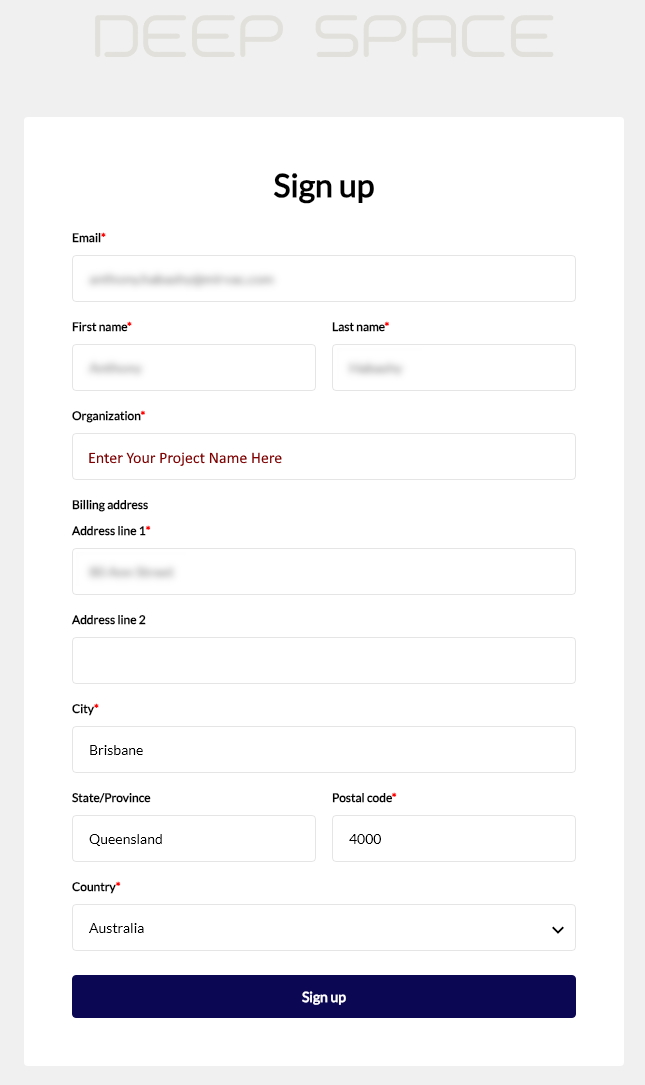
3 - Input information (Note at this stage Organization on this page refers to new Project Name)
4 - Verify Your Email
5 - Login to the new project, go to Admin Console and invite additional team members.
6 - Enable any relevant Integrations